Many data scientists today find themselves deploying production solutions using single notebooks, often grappling with poorly managed project dependencies. This approach inevitably leads to challenges in scalability, maintainability, robustness, and portability. As a continuation of our journey from single Python file projects to production-ready code (check out our previous article [Previous article]), this article delves into practical solutions. Today, we'll explore basic strategies for data scientists to effectively manage their project dependencies and configurations. By embracing tools like config.yml and requirements.txt, we aim to guide you towards a more organized and scalable approach to Python project management.
To demonstrate these techniques in action, we will be further developing our sample project using the Titanic dataset. While this problem may seem familiar, the focus of this article is on the quality of the code, not the problem at hand. Keep in mind that while the production-ready solution we'll be working towards may be overkill for this non-real-world problem, it serves as a useful example for demonstrating these techniques in practice.
Managing python project dependencies
The 'requirements.txt' file in Python serves the purpose of listing and managing project dependencies. It allows you to specify the exact versions or version ranges of external packages required for your Python project. When you share your code with others or deploy it to another environment, having a well-defined 'requirements.txt' file ensures consistent and reproducible installations of the dependencies needed for your project to run smoothly. This file is commonly used in conjunction with tools like 'pip' for efficient package management in Python projects.
The process is simple, first create a new file called requirements.txt in the root of your project directory. Next, open this file and populate with the name and version of each pip installable package that you are using, and remember to keep this up to date as your project matures. The format of the file can seen in the image below, simply follow the convention: package_name==package_version number.
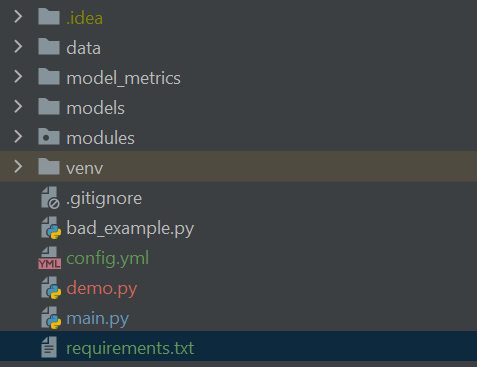
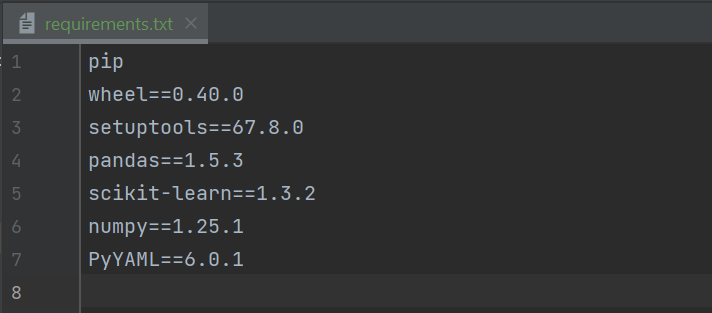
We can them simply install all packages to our project environment using the following command:
pip install -r requirements.txtNote that for this command to run you must have navigated to the project root directory and also have saved the requirements.txt file in this location, otherwise you will have to give the path from the current location to the file.
Managing project configurations across multiple environments
When working across multiple environments, we find that parameters vary; for example, file paths and table names might differ significantly. A project configuration file serves as a centralized repository for critical parameters, offering a structured approach to manage environment-specific details such as file paths and API endpoints. The primary purpose lies in maintaining a separation of concerns, facilitating seamless transitions from development to staging and, ultimately, to production. This modular approach enhances maintainability, easing updates and adjustments without the need for code modifications. Furthermore, the configuration file fosters collaboration by providing a shared, comprehensible source of truth for project settings. In the context of security, it can ensure sensitive information remains separate from the codebase. Ultimately, the configuration file proves indispensable, streamlining the deployment process and promoting a standardized, adaptable, and secure framework for Python data science projects.
We will use the YAML file format for our project configuration file. As a best practice, project configuration files should be stored separately from the codebase, but for our example we will store it in the root of the project directory.
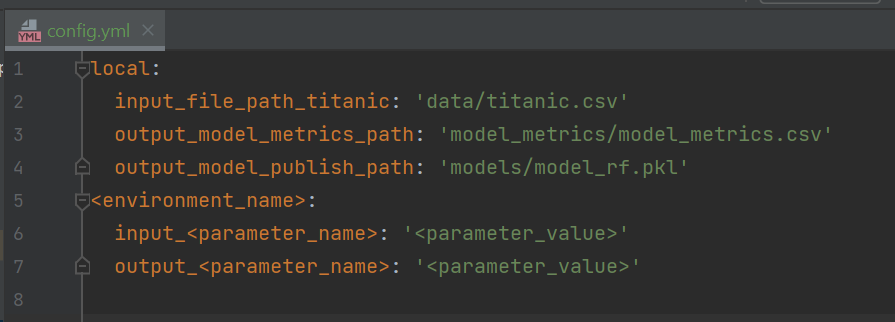
Simply create a file named config.yml at the root of the project. Next we will add parameters for an environment named 'local', this will be the environment of our local computer, and thus we will populate it with any file paths that we previously hard-coded into our codebase. You can see in the below screenshot that we have abstracted out file paths for the input dataset, along with the output file paths for the model and model metric logging. We can then add additional environments directly to our config file as shown in the screenshot.
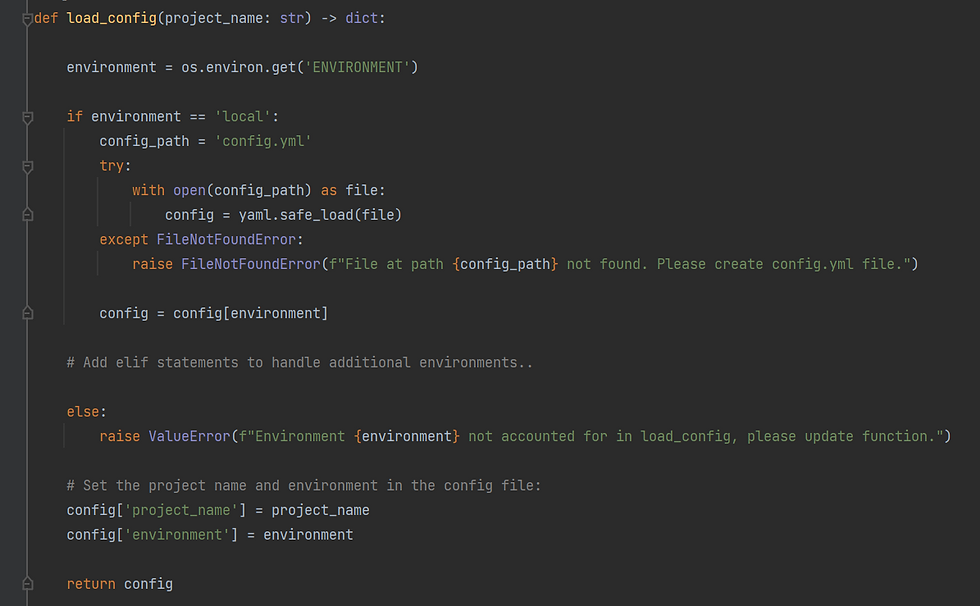
We can now create a new function load_config() in our python module to read in our config file as a python dictionary, which we can then use throughout the codebase. We will determine which environment the project is being run in by searching for an environment variable we set called "ENVIRONMENT", in our case we have set an environment variable on our local computer as: ENVIRONMENT = local, we would then set environment variables in all other environments as required.
In a real project, we would store the config file in one centralized repository, for example within an azure gen2 datalake, we can then download this file and read it in as required, this ensures a single source of truth for our configuration file. But for this project, to avoid having to setup an external storage location, we will save a duplicate copy of config.yml in each environment we work with, and thus we will handle loading the file for each environment separately using if statements. This will work sufficiently for our demo purposes, but will not work in real-world setting, as this can lead to misalignment in versions of config.yml.
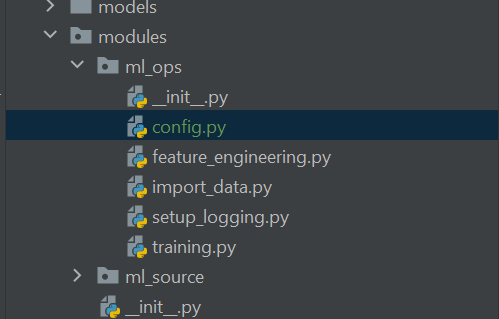
Lastly, we can update our codebase to load the config file and use throughout, see example for importing data below. Note when dealing with inputs and outputs, we sometimes find that the file types differ between environments, for example when working locally we might use static csv files, where is in the cloud we might query data from tables, we can address this by using if statements to handle differing situations in various environments.
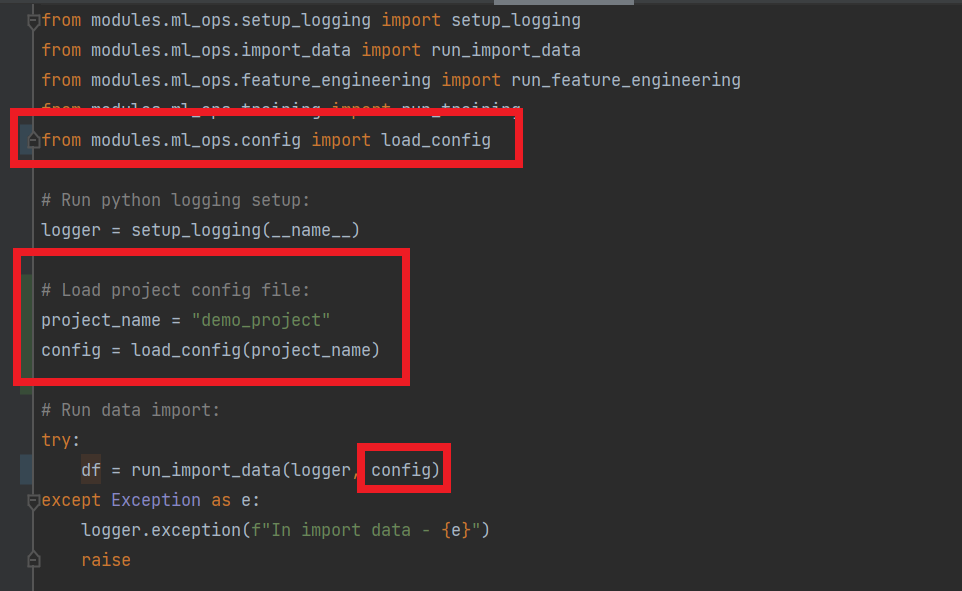
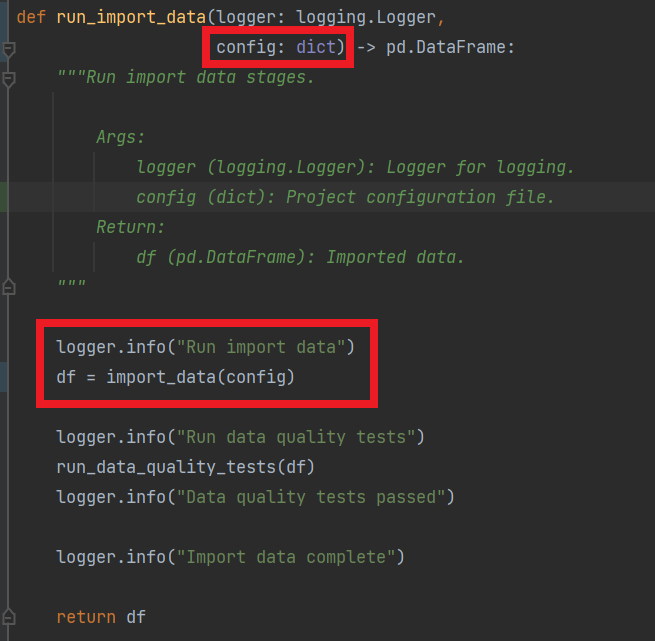
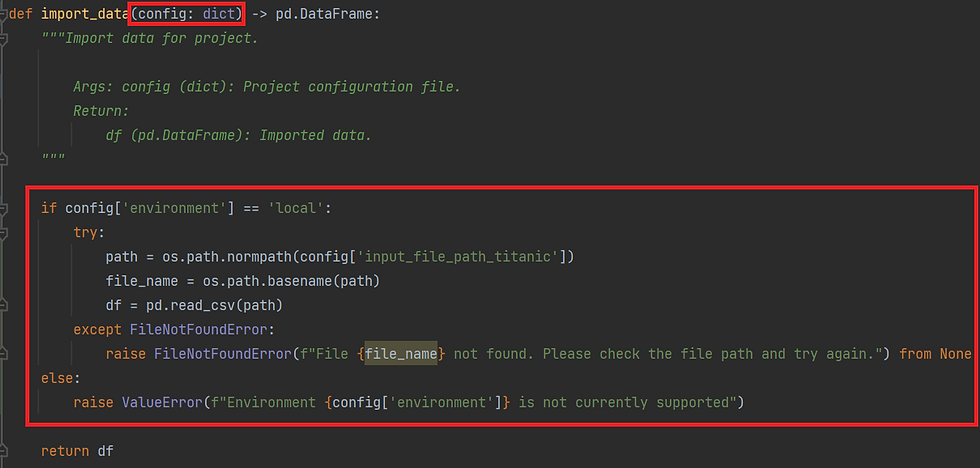
By refactoring all project parameters into the configuration file, and addressing all environment specific tasks such as reading and writing, we can then easily port our data science projects to new environments as required.
To port a project to a new environment, one simply has to update the config.yml file, and update the codeblocks throughout the code for dealing with inputs and outputs.
Final Words
Managing project dependencies and configurations across multiple environments can be a daunting task for a new data scientist, but implementing the two practices outlined above is a simple method to ensure portability, maintainability, and scalability of your projects in production.
Please find the tutorial repo here: https://github.com/jacobdylanjd/PyMessyToMasterpiece/tree/main
Comments